I went out a couple of days, in lighter wind. I popped the A1.5 up and returned under main/engine. I also refueled last weekend.
That’s all the updates I have. Much going on on the personal front.

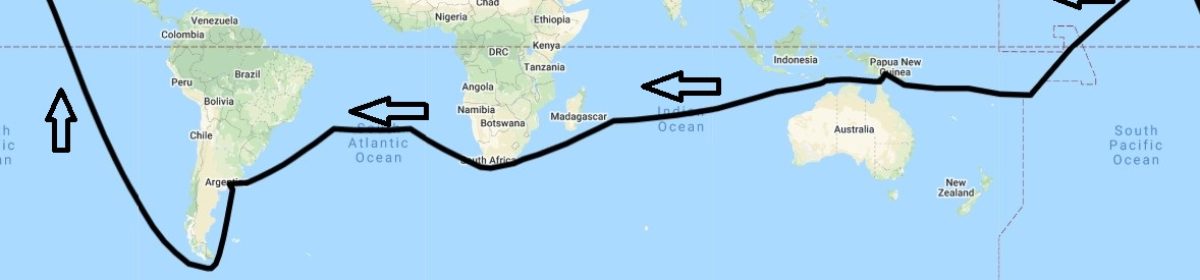
An attempt at circumnavigating Earth on a small sailboat
Sailing from San Francisco to San Francisco
I went out a couple of days, in lighter wind. I popped the A1.5 up and returned under main/engine. I also refueled last weekend.
That’s all the updates I have. Much going on on the personal front.
Today was my second visit to CaB since back in HMB. All I did was bring back the A1.5, the flying fish spinnaker, the fractional code 0, the masthead code 0, the gennaker, and the jib top. I also motored out to get the engine going and get some water flowing on the hull, like I did last week. Last week I also rinsed the deck and tightened up the D1 one turn as I noticed that they were slack on the leeward side when we sailed upwind coming back from the repair.
I’m still struggling with what to do next. I did some writing but honestly, nothing is clear. I need to go sailing, that I know. Re-connect with CaB.
It’s been more than four months since my last post. A lot of water has gone under the bridge, dirty water. There’s only so much I’d like to put out in the public but suffice it to say that (lucky me!) I had not suffered the kind of experience I went through over the past three months. I know, I know, third-world problems. I don’t mean to say that this was the worse of my life events but this one was just something I had not experienced before.
There’s nothing I can do about it, I’m on the pity potty. Well, more specifically, I’m working my way out. I’m also about $16,000 poorer and have little to show. See that’s what I’m saying … pity potty.
On March 23rd Changabang was driven on the submerged rocks of Point Cavallo, and I injured my back at the nav table. The boat was hauled out at Svendsen’s Bay Marine for inspection and repairs. The structure was inspected using thermal imaging equipment by Bill Trenkle. No structural damage was identified. The keel bulb needed to be repaired. The battery box inside the boat also needed repairs. All the work was done professionally. The yard took their time to do things right.
I had to re-assemble the cradle as otherwise I’d have been charged hanging fees. A deal was made with BMC (where the cradle had been “stored” since shipped from France) and another one with SBM (to keep it there).
Sadly after sitting out of the water for a week or so, I noticed that the bottom paint was cracking and peeling. This had already been happening in the water; it was not just a matter of the pain drying (it did accelerate the process though). What we discovered is that the previous painters did something wrong (could be the guy who prepared the boat for the RdR, could be the other yard I worked with, I don’t know and SBM was not keen to assign blame). There was some sort of soft layer between the hull and the paint layers.
I opted to have the yard strip out everything and apply three coats of epoxy, and two coats of paint. And just that blew up $10,000.
With the boat out of the water, we changed the oil of the sail drive (also replaced the drain plug). Finally, I picked up Changabang last Saturday, motored out the gate, and sailed to HMB with the wind on the nose.
Alex pulled out of the partnership and the PacCup race. So, now, it’s a matter of figuring out what I want to do next. She’s dirty inside and out; there’s tons of gear hanging out everywhere at home. What will we do next, Changabang and I?
It was a light wind day, so trying out the new sails was good. We hoisted both the new jib and the new spinnaker. Alex’s main observation is that the boat is much more balanced under these new sails. I’ll say it is really nice to have sails that were cut for Changabang! I think it’ll take some trial and error to see if we need to make some adjustments to the current setup. I also would like to experiment with stronger winds when CaB is fully powered up. In ocean swell it’s not clear what sort of speed we should be able to achieve. And getting Sylvain aboard to help with trim would be good to. I think with the “new old” main sail we will have a much better arsenal.
I’ve also continued to remove stuff from the boat for our weighing event in March. I brought back home the gennaker, the 2 code O, the jib top, and 2 spinnakers. And there’s still plenty to bring back.
As we were sailing I noticed that the starboard D2 was a little slack when to leeward so I went up and gave it a full turn. I also gave the starboard D1 a turn. I took pictures and traced a line along the mast track as usual. I don’t think it looks worse than it did before. I do feel like there is still a slight bend to starboard.
Last, it looks like the engine is happy as I couldn’t see any leaks. Crossing my fingers that my handy work is holding up.
And it was yet another day of boat work, nothing fancy though. I changed the engine coolant and flushed the heat exchanger (the water was clear). So with that, the only thing left would be to change the sail drive oil.
I also hacked the life raft door seal back together and slapped the door back on the stern. That is not a perfect job and I do expect water ingress.
I also inspected the auto-pilot coffers and found oil in the port one. That is not news and I am not sure yet where it is coming from. To be honest there aren’t many options: it’s most likely the oil from the cylinder.
I hoisted the old jib to let it dry a bit, removed it from the headstay, and flaked it somewhat correctly. This is to make room for the new one. I also cleaned the deck to remove a fair amount of bird poop.
All right we took delivery of two new sails. We both can’t wait to see how these affect CaB’s performance.
J2 HANK ON CARBON TAFFETA MENBRANE
Area:43.8 m2
DESCRIPTION
Leech and foot Line Included
Horizontal battens Included
Blue water finish Included
Soft Hanks Included
DETAILING
Tell Tail Window Included
Shape Stripes 3
Sail Bag Pro-Race Zip Bag

A2.5 ALL PURPOSE ASYMMETRIC
Area:187 m2
DESCRIPTION
Cloth contender SK 90/80
Blue Water finish Included
Dyneema luff rope Included
DETAILING
Tell Tails Included
Sail Number Included
Sail Bag Pro-Race Launcher

I replaced the engine’s air filter aka air cleaner aka inlet silencer.

I also sanded a bolt, washer, and spade terminal that connected the house batteries to the battery isolator.
I also noted that the battery’s resting voltage is 12.9V. And that in two days about 3 Amps had been drained. So at this rate, the batteries would reach 50% capacity in 100 days or so. I will continue to monitor.
Tomorrow looks like a day with no wind but Sunday may be our first opportunity to try the new sails. I am hoping to muster enough energy to go and replace the engine coolant tomorrow.
Latitude 38 reached out a few months ago to help them write up an article about our preparation for the PacCup 2024. Here it is on the front page! Link to the article online. Link to a PDF version.

Yesterday I spent time looking at the batteries in CaB. They are T82 Power-Tech Calcium-Lead batteries of 100 Ah capacity. They have a little indicator of “health” and all 3 show as green.

I looked at the charger and changed the charging profile to the saved profile for Calcium/Lead batteries, and let it run overnight. I also looked a bit closer at the battery monitor and changed the settings to better match what’s in place. This morning the charging current was down to 0.5 Amp with a floating voltage of 14.52 V, where I would have thought the charger would have dropped to 14.4V (as per settings). In any case, I’m hoping that I can now use the monitor to track amperage consumption and confirm how much capacity is left.

I also took a few pictures several weeks ago and identified that there is a battery isolator on the alternator charging path (Sure Power Model 1202; max alt amps = 120 Amd, CD Volt: 6-50, Grond Negative). I also identified the alternator to be a Mitsubishi A3TR0093AM (12V – 115A).
Today we made progress on several fronts. First, after having removed some of the equipment we won’t need for the race, I decided to organize our space and stow things somewhat neatly. As a result, the forepeak and two bunks are available now. Once I finish the engine maintenance, I’ll be able to do some more cleanup.
Next, we went out to practice crew overboard recovery maneuvers. We first tried under engine and learned a few things. The MOB button on the NKE electronics does a few things for us: of course, it records the position of the MOB (when the button was pressed), it displays a page with directions to the MOB, and finally, it turns the boat in the wind. For the race, we have to record a video of the maneuver. We next tried under main sail alone. We decided that we would not allow the boat to go into the wind. I gave it a go using the classic figure 8; after making my way back to the fender that we had thrown overboard, we just couldn’t find it.
As we were concerned that it was stuck on the keel or maybe the sail drive, we made our way back to the fuel dock under sail, which was a bit nerve-wracking. The wind was at a good angle for the entrance to the channel, so we managed ok. Alex jumped overboard and couldn’t find a thing under the hull. By then the tide was so low that I could not make it into the slip. 90 minutes later and I powered into the slip in reverse.
While I was waiting for the tide to rise, I tried to sort out the battery charging situation. The shore charger seems to be connected to the starter battery and the house bank using different outputs (on the charger). So disconnecting the house bank from the shore charger would be as straightforward as removing that connection (I think). The alternator is wired to a battery isolator, which may be a solution to prevent damage from the BMS disconnection causing damaging load dumps (need to verify this).

I’m not much further ahead as the main problem remains unsolved: what to do when the BMS disconnects the house batteries. I had hoped that the Watt & Sea could possibly provide the necessary power to take over but it 100% requires a battery in the system. In fact, they are recommending a solution that requires the option to disconnect the generator from the converter.
The batteries in Changabang predate my ownership. At best, they must date from before the RdR 2018, probably 6 months before that. In other words, they are at least 6 years old. That’s pushing it for what they are I think:
The engine starts just fine on the battery, with no sputtering. I can’t find a similar battery for sale so I’m not sure what this is TBH. It also means that I have no idea if these require some sort of maintenance. That said, there are plenty of choices to replace it.

The battery monitoring system in place is not working correctly though so I am not sure how much capacity is left in the house bank. They have been used offshore for at least 2 months. It’s hard to say how much is left in them.
All the above to say that replacing the batteries has been on my mind. And that means that there may be an opportunity to change chemistry and explore LiFePO4 batteries. And this got me in a few rabbit holes, soul searching. Hence this post to help me organize my thoughts!
Before I dig in further, I’ll lead with a few words about charging capabilities on CaB.
On CaB we have the following sources of electricity:
Ok, so the first thing is to figure out what my use cases are for batteries.
Of course, there’s the engine starter battery. But there’s more to this because this battery may die, hence the house battery must be able to at least a few times start the engine. And, similarly, the house battery may die and the starter battery must be able to step in to drive all the boat’s systems.
Next is to define how I would use the house bank. This bank drives everything on the boat except the engine starter, so let’s clarify how I plan to use the boat:
All that matters here is that the batteries are kept charged up and not left to discharge for a long time. “A long time” means different things for different chemistry. For lead acid, if I was not to do anything with the boat for more than 6 weeks, I would want a charger to keep them floating or top them up regularly (which is what I do now with the shore power charger). For LiFePO4 my understanding is that the discharge rate is so low that it doesn’t matter (it is recommended to charge them before storing them for a long period, e.g. 3+ months). If we combine chemistries then we are facing two different charging profiles.
The starting battery is used twice (to leave the dock and return), maybe a few more times. I’m motoring likely 30 minutes in total, maybe more. The hope there is that the 115 Amps alternator will run enough to top up the starting battery.
Then we sail for something like 4-8 hours, drawing something like 5 Amps from the battery (a good guess), for a total of 40 Amps. Let’s round that up to 50 Amps, which is about 15% of the battery bank. Again the alternator will feed some back in but what I am also doing every so often is plugging the batteries on the shore charger to top them back up.
The bottom line is that these events do not require charging while at sea and the batteries can be topped up in port. If anything fails then it’s not a big deal because we can get back in port safely, even if that means finding a downwind slip/side-tie to sail in, should we not be able to start the engine. Worst case: one could call a tow boat.
Here we need to consider the return trip as well. Sailing to Hawaii is about 1.5 weeks and sailing back is about 2.5 weeks. The key assumption is how we can approach redundancy. In other words, I feel like we only need one backup plan, not 3 or 4 as would be needed when sailing non-stop RTW.
In a race, the engine should not be used, except on an exception basis:
Also, we should be in movement all the time, so the hydrogenerators can be used to top up the batteries.
Here we do want multiple solutions to charge the batteries and we need multiple solutions should the starting bank or the house bank fail. This is a more serious conversation but one that can easily be solved with a spare house battery, a spare starting battery (or a jump starter), and three charging solutions already onboard (engine, solar, HG). So I won’t consider this use case too much for now.
Considering an upgrade to LiFePO4 here are the issues I see:
Here’s a proposal that I think would work:
And here’s how things would go for each use case above:
The weaknesses in the above are:
Essentially the bare minimum approach here only requires purchasing a LiFePO4 battery. The prices vary wildly; with budget ones in the $250 range (LiTime), mid-range in the $400 range (SOK marine grade 100 Ah), and premium going all the way beyond $1000. Improvements include a diesel engine jump starter ($100?), a DC-DC charger ($300), and an additional LiFePO4 battery.
Validate the current wiring and see what’s possible. My guess is that there is a bus bar for charging to which both systems are connected. If that is then it would be a matter of creating a separate bus bar to charge the house bank. The alternator and shore charger would remain in place. The hydrogenerators and solar panels would go to the new bus bar. And possibly a DC-DC charger would be setup in between both bus bars.
Today we met with David H. our PacCup inspector. He did a thorough job at checking that we met the race requirements, and we passed! The past 4 months of work have paid off. This is a major milestone on our get ready list. There are a few more, not the least being two videos: one of a crew overboard recovery, and the other of us steering with a drogue.
I think I had taken the storm sails out of their bag a while ago but I just couldn’t exactly remember how they looked. There is the trysail, a large storm jib, and a smaller one. For the PacCup we’ll only take the large storm jib with us.
The new sails will soon be ready too. So things are progressing nicely.